Import a Bitbucket repository
This guide walks you through setting up Cube Cloud, importing a Bitbucket (opens in a new tab) repository with an existing Cube project via SSH, and connecting to your database.
Step 1: Create an account
Navigate to cubecloud.dev (opens in a new tab), and create a new Cube Cloud account.
Step 2: Create a new Deployment
Click Create Deployment. This is the first step in the deployment creation. Give it a name and select the cloud provider and region of your choice.
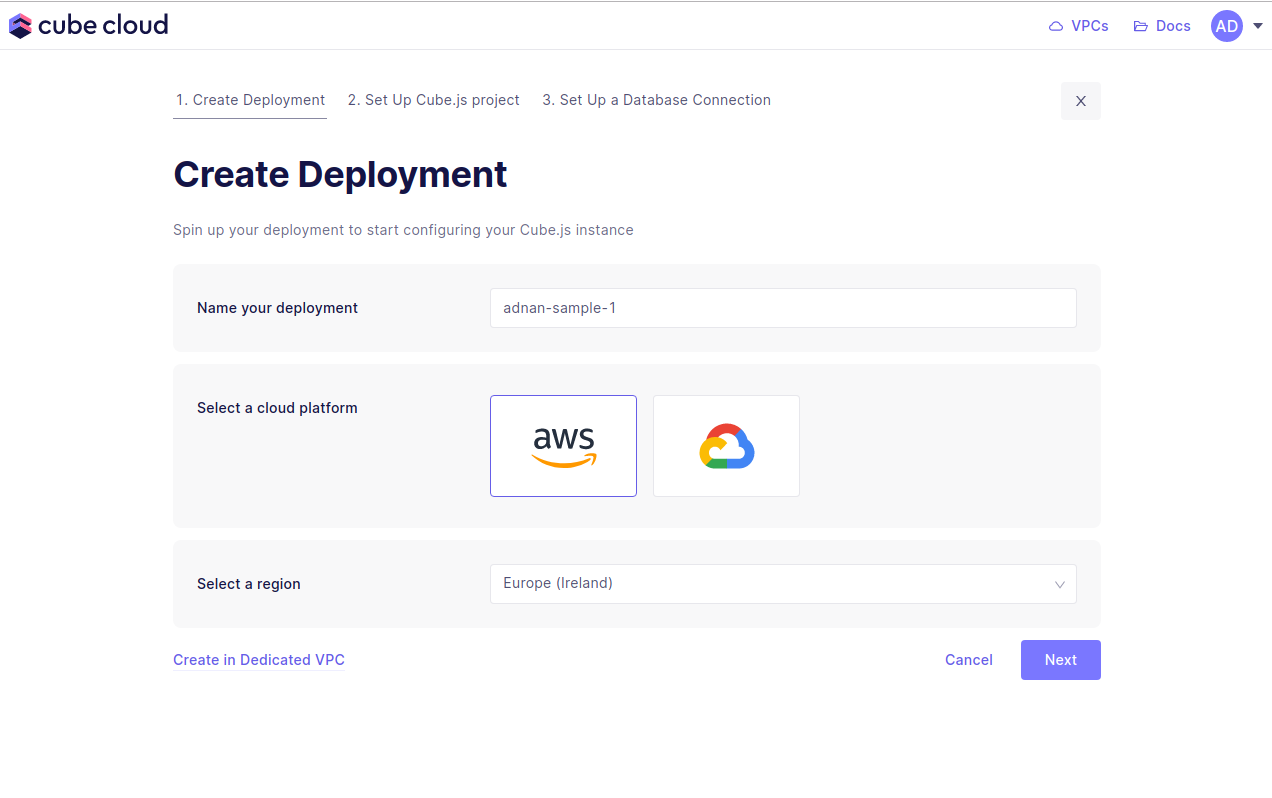
Microsoft Azure is available in Cube Cloud on Enterprise and above (opens in a new tab) product tiers. Contact us (opens in a new tab) for details.
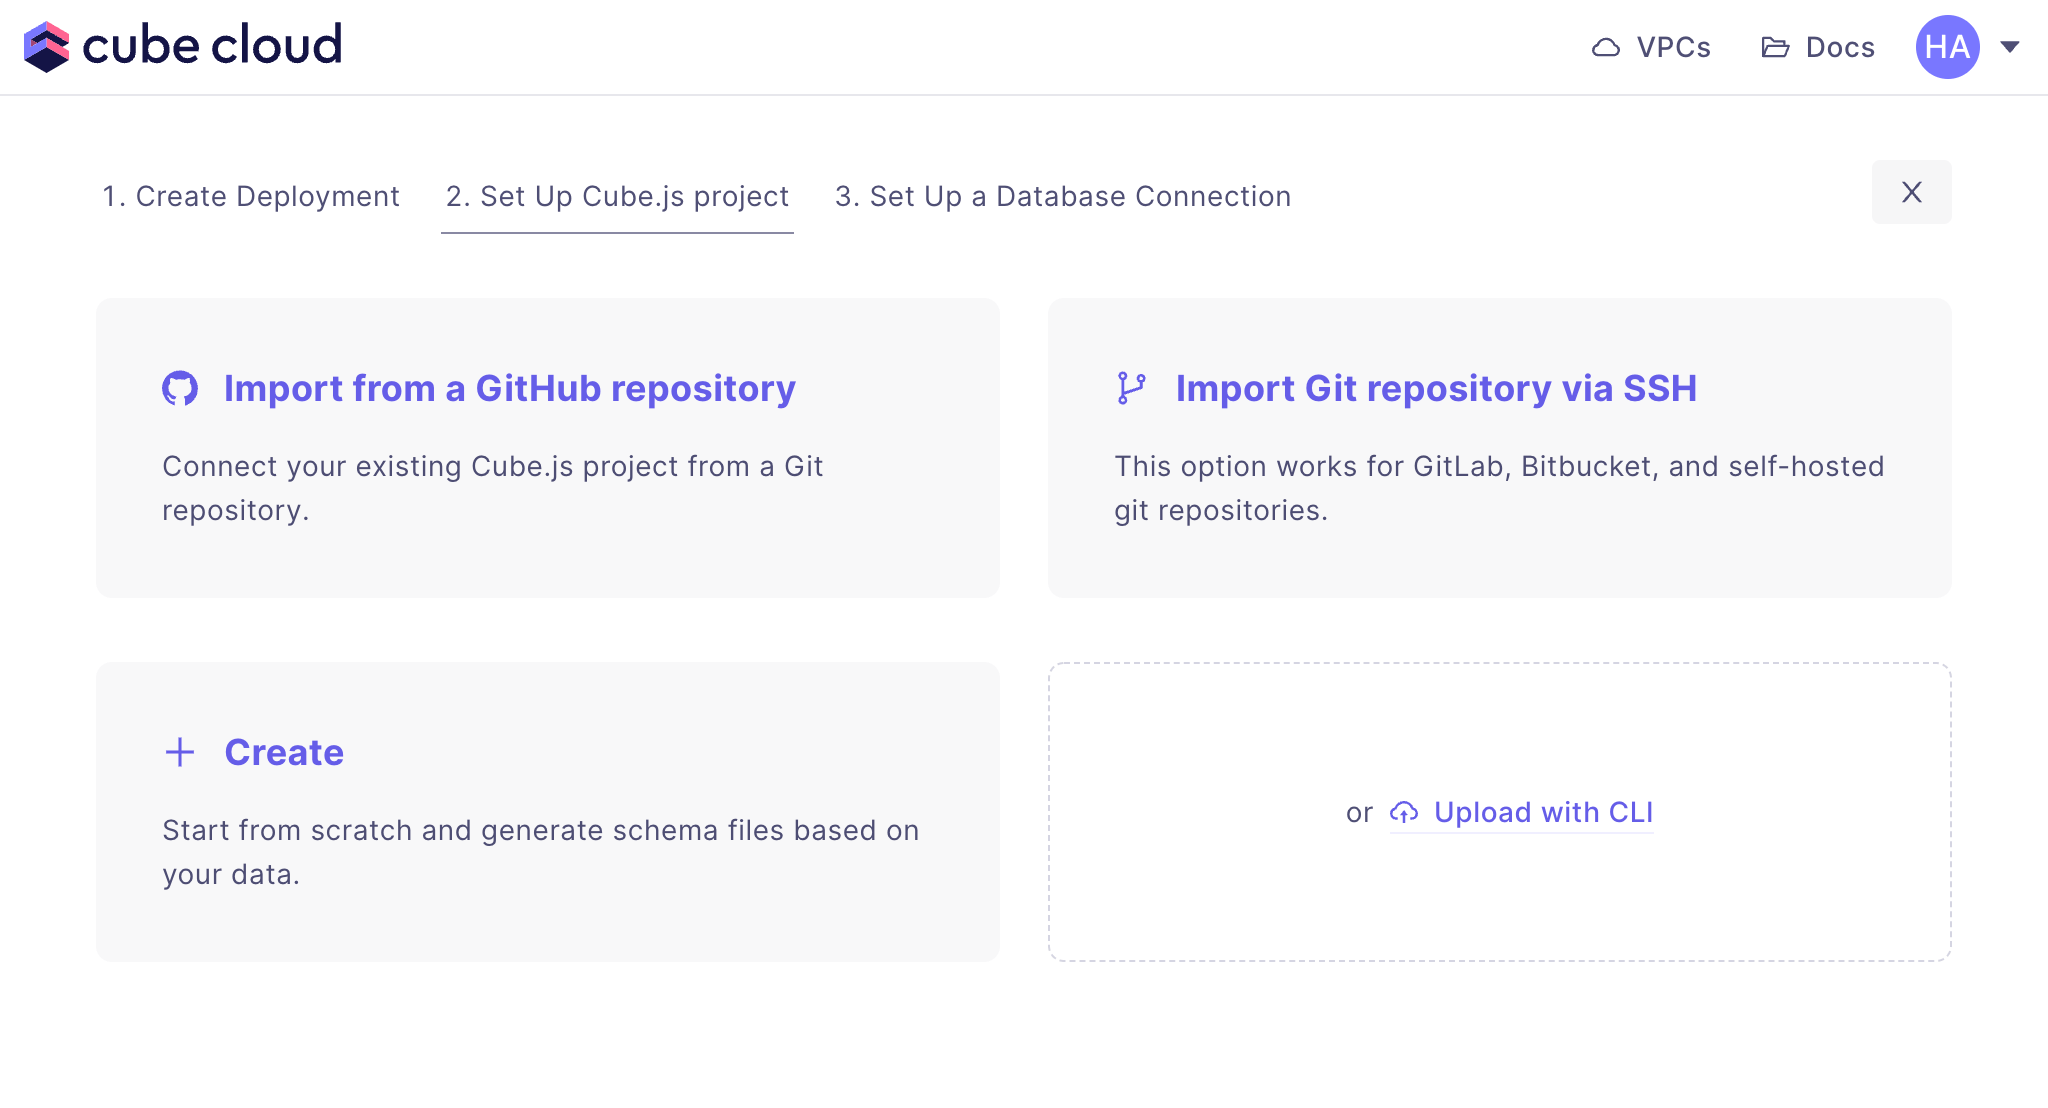
Step 3: Import Git repository
Next up, the second step in creating a Cube App from scratch in Cube Cloud is to click Import Git repository via SSH.
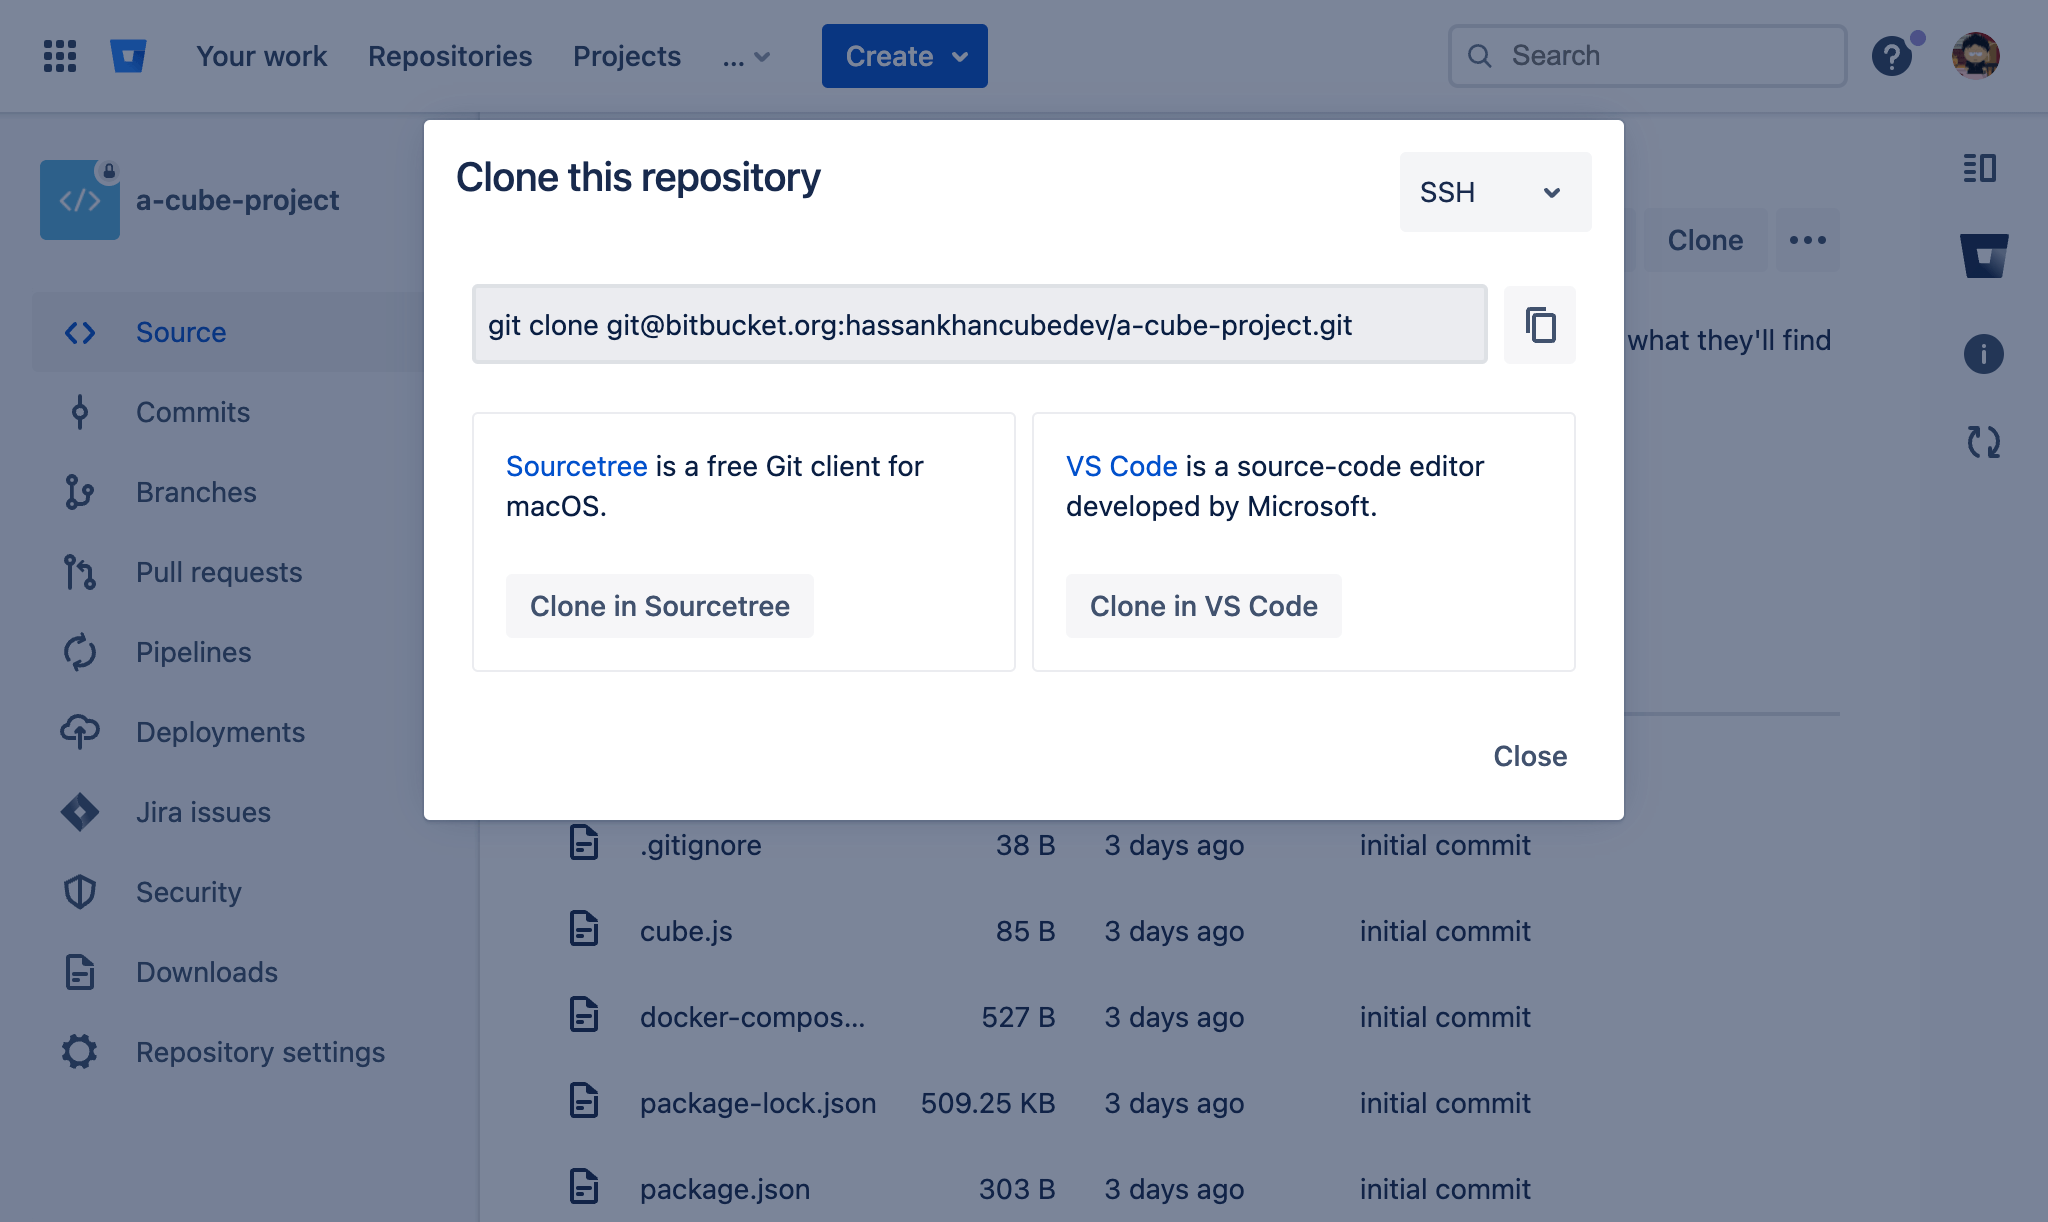
Now go to your Bitbucket repository and on the Clone dialog, switch to SSH and copy the URL:
Back in Cube Cloud, paste the URL and click Generate SSH key:
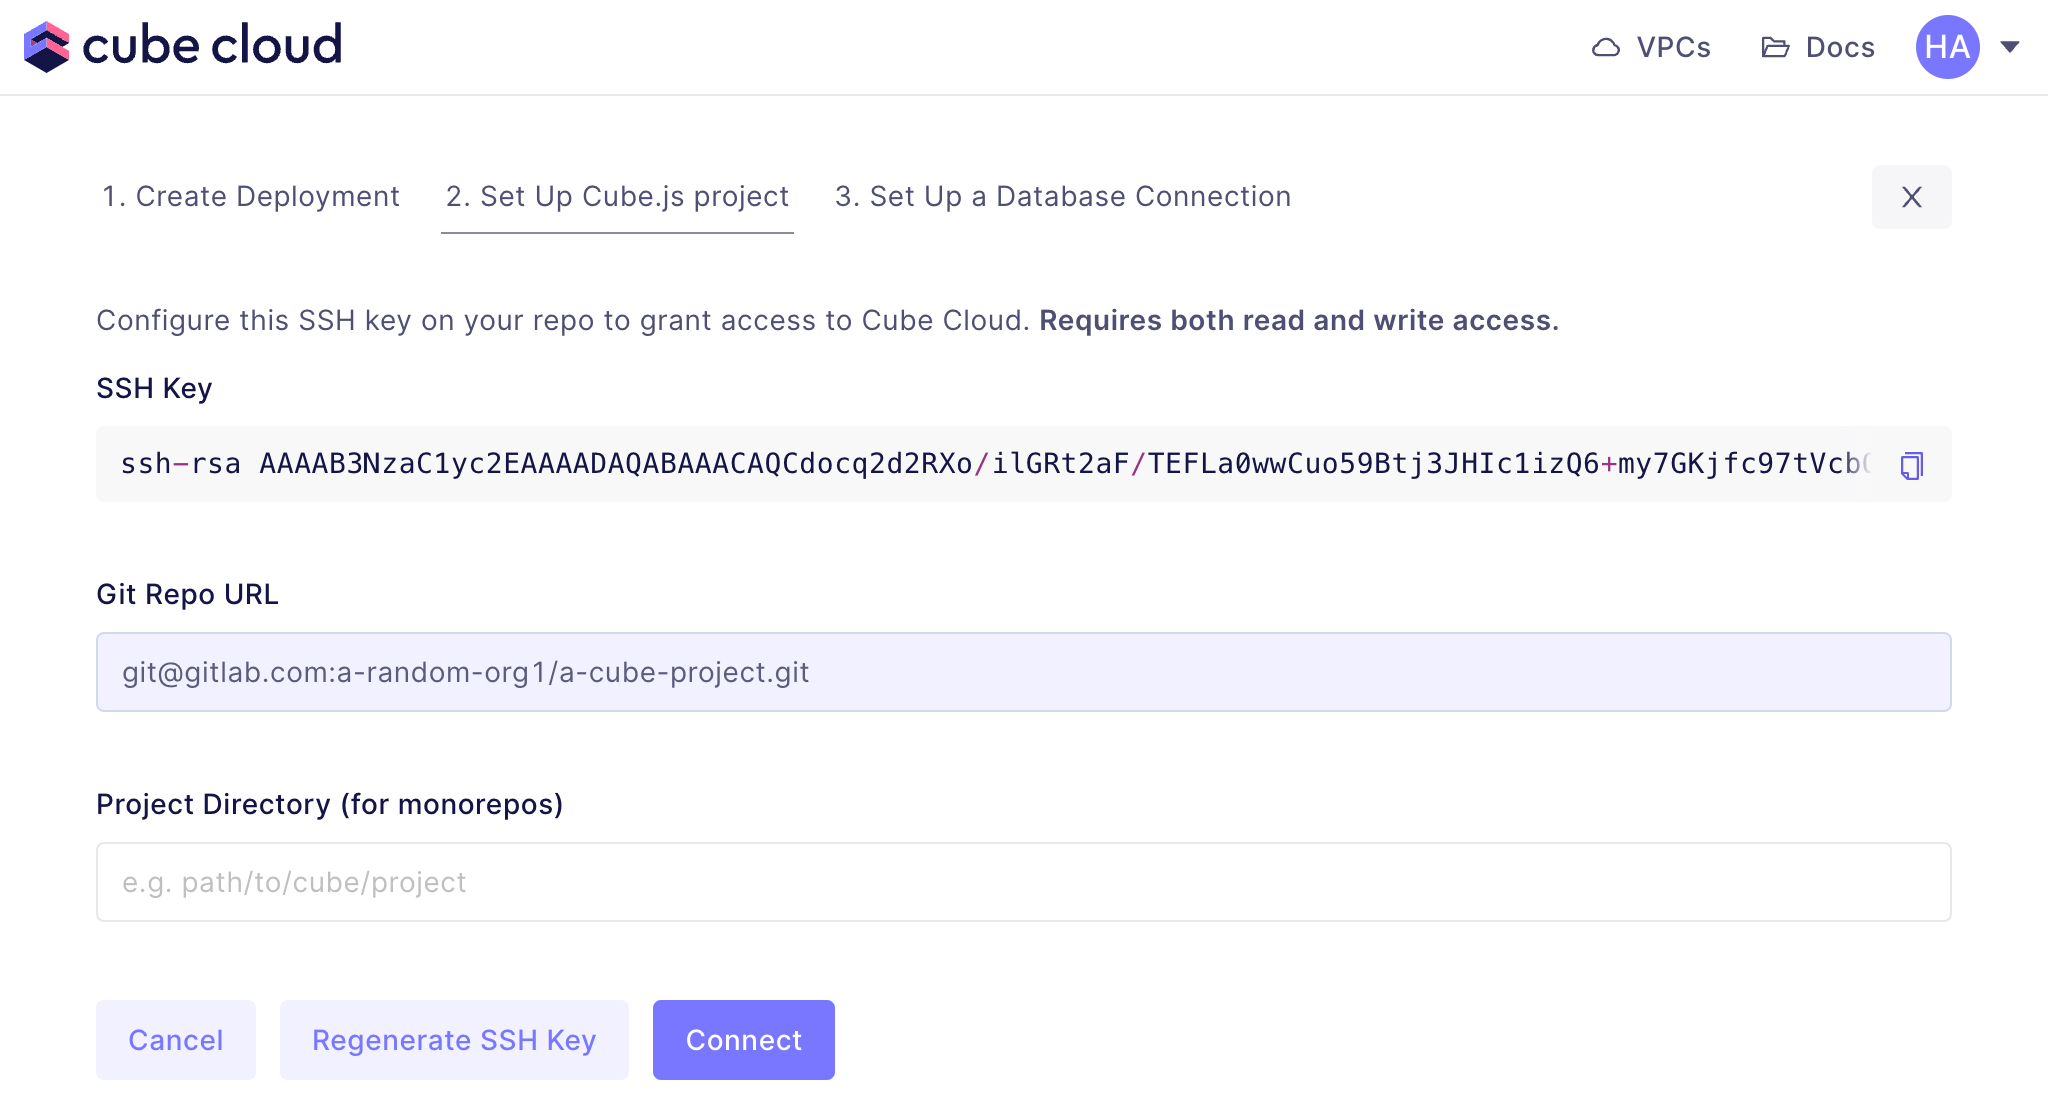
Now copy the SSH key and go back to Bitbucket and into the repository's
settings. Click Access keys from the navigation, then click Add
key button. Give the key a label (Cube Cloud, for example) and paste the
SSH key in the relevant field:
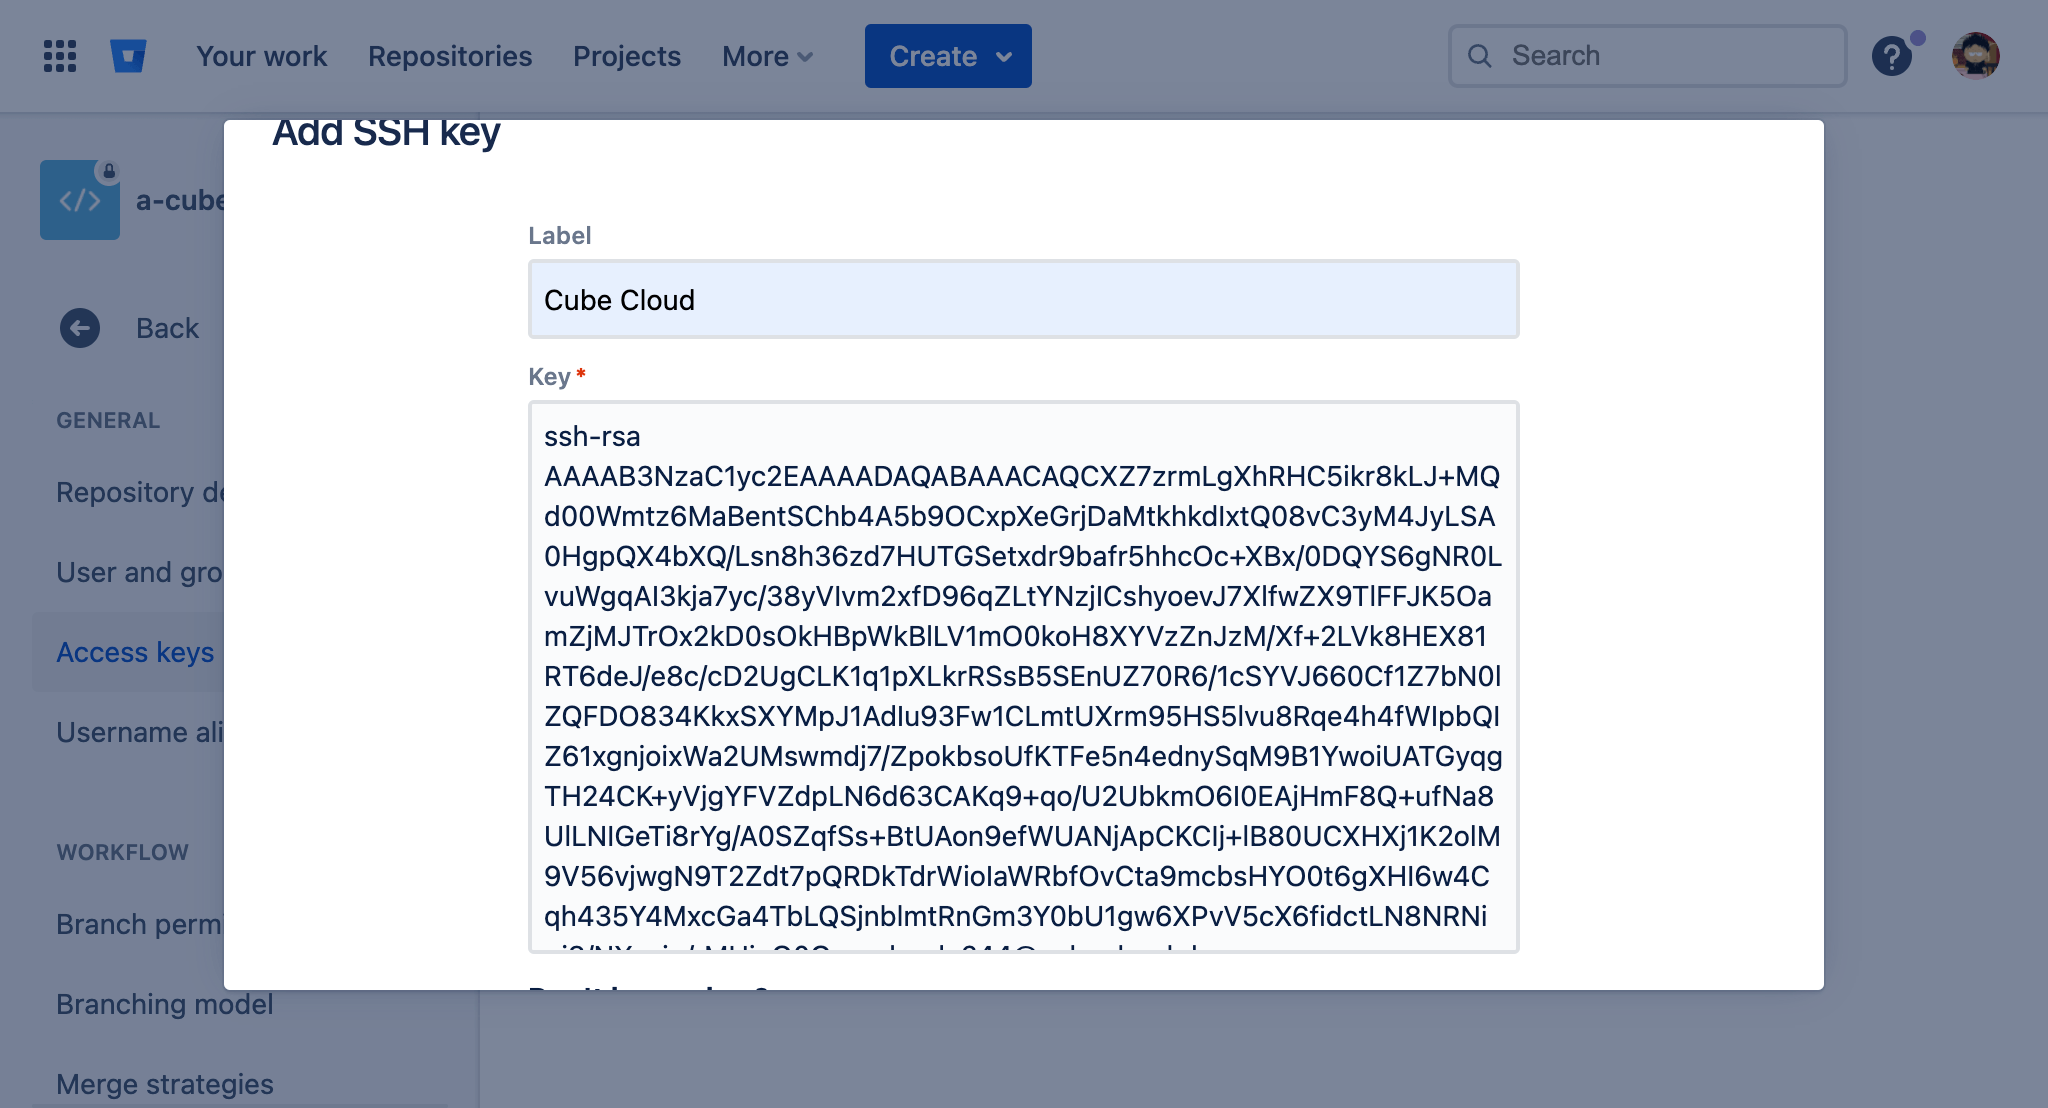
Click Add SSH key to save, then go back to Cube Cloud and click Connect. After a connection is successfully established, you should see the next screen:
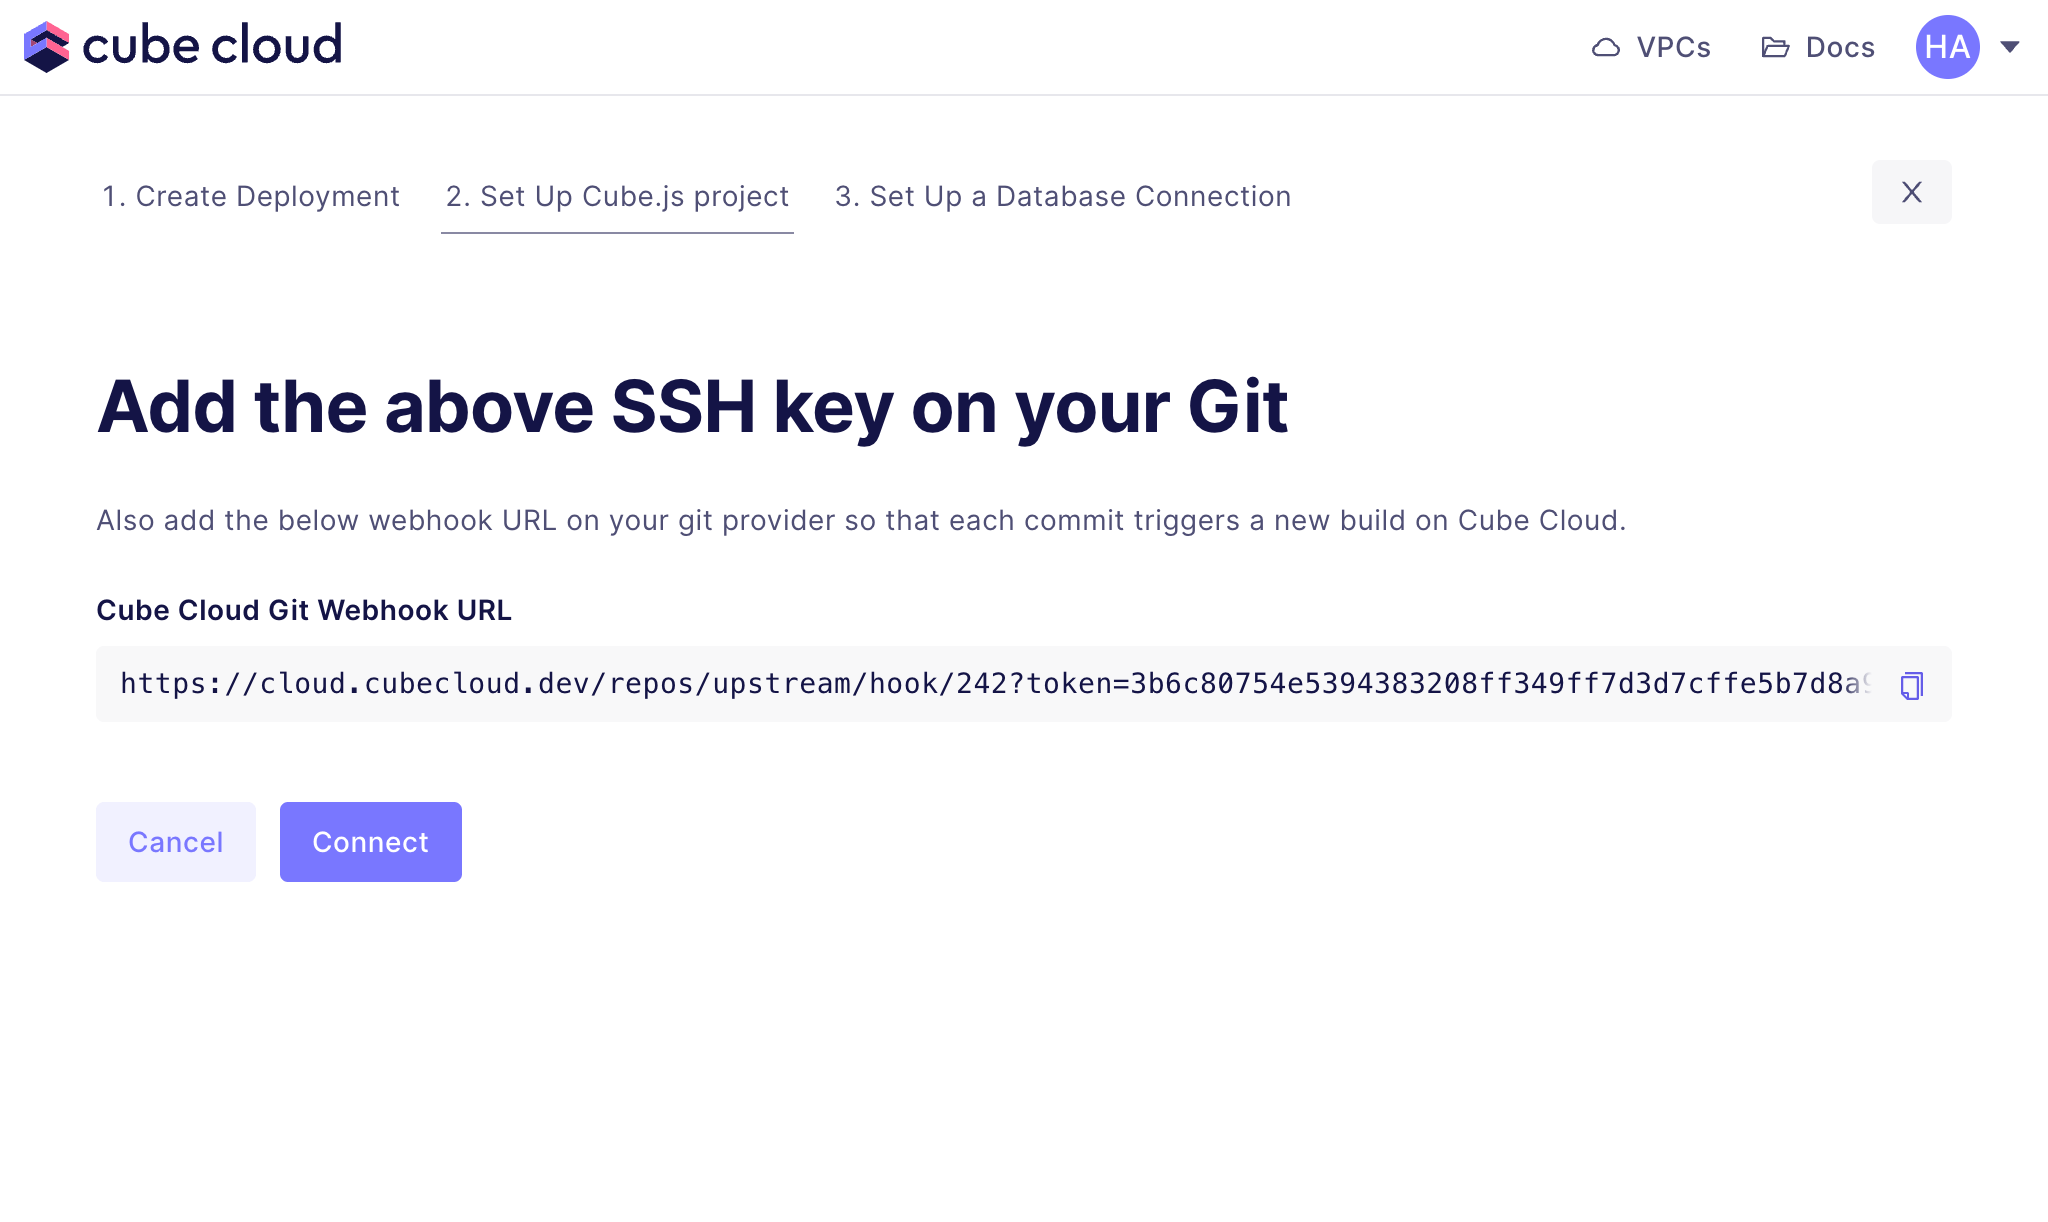
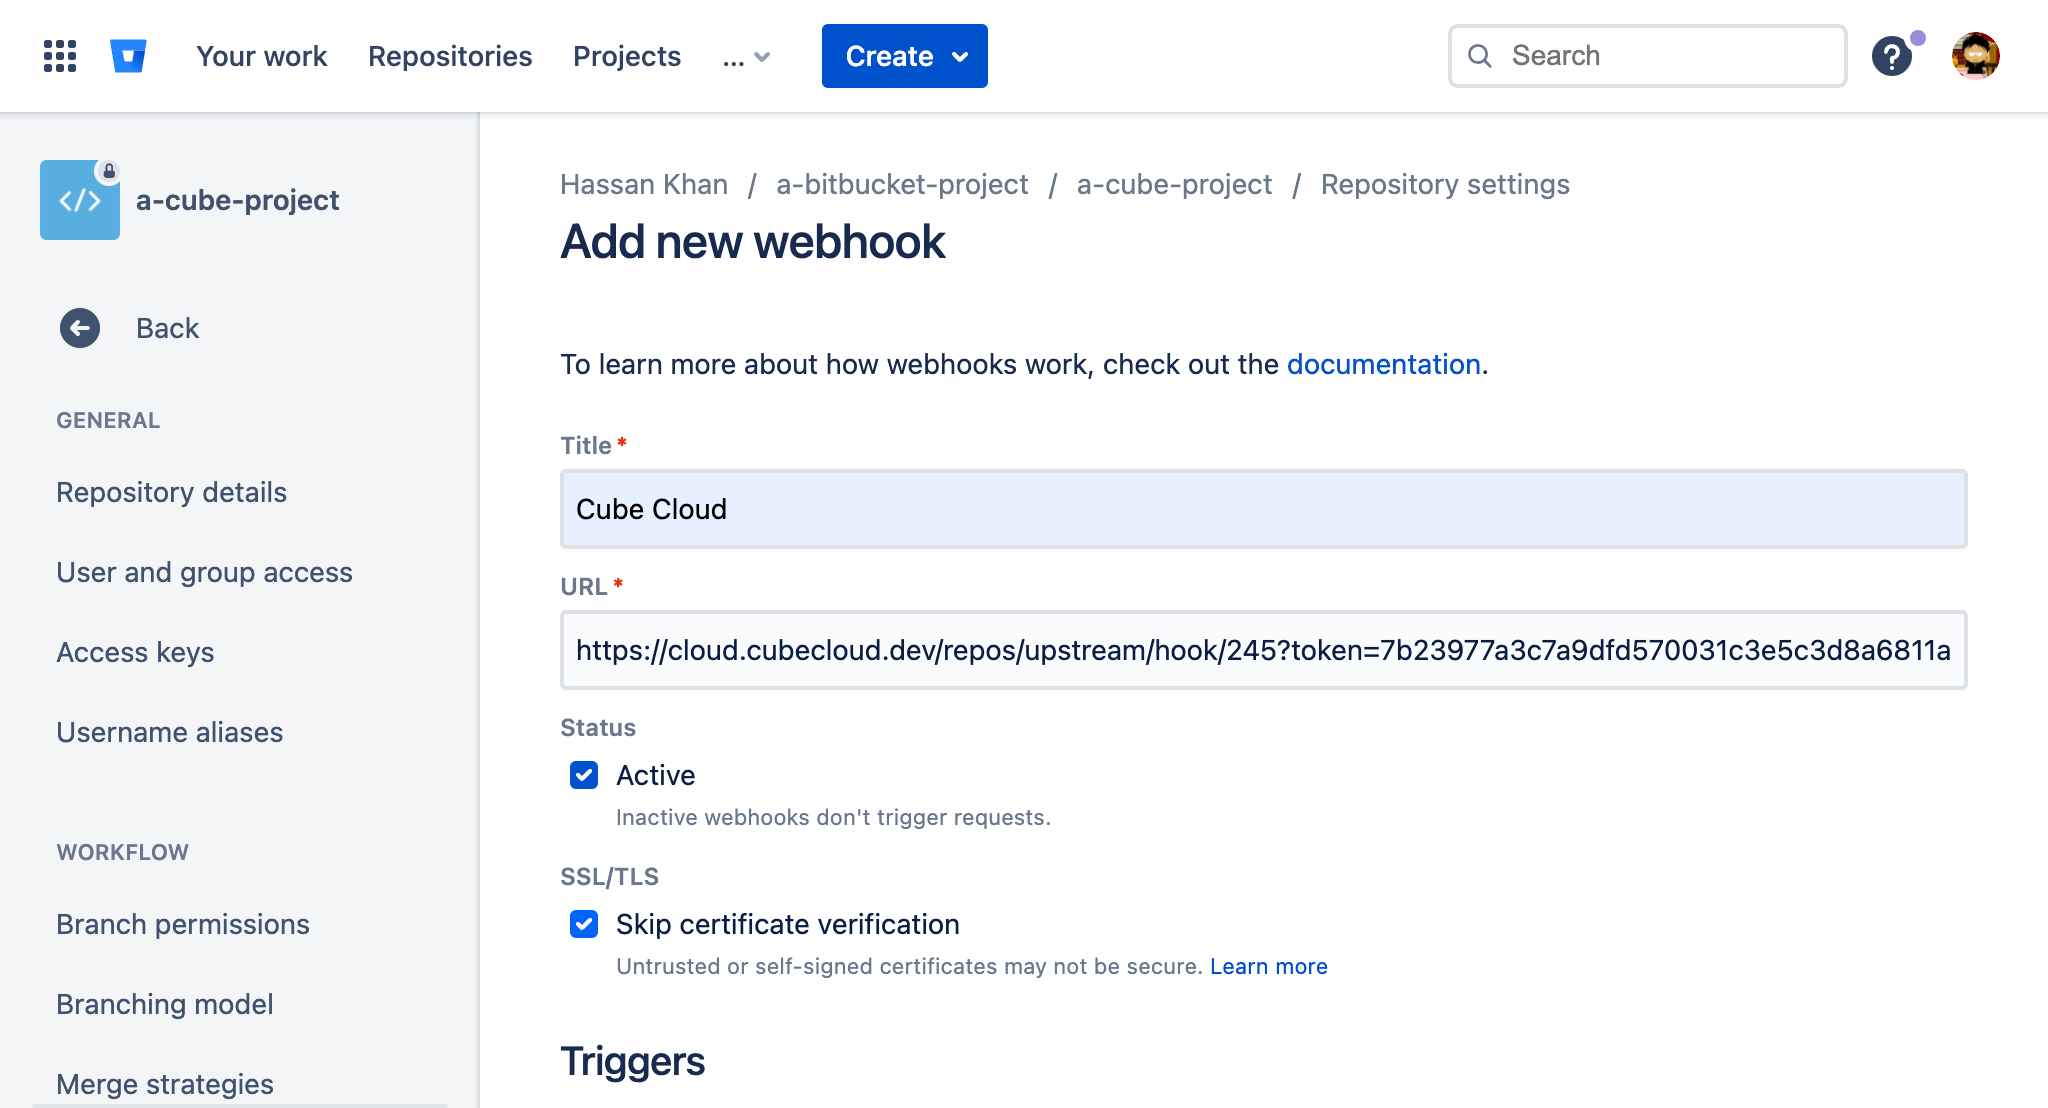
Copy the Cube Cloud Git Webhook URL, go to your Bitbucket
repository's settings, and click Webhooks from the navigation.
Click Add webhook, then add a title (Cube Cloud, for example).
Paste the URL into the correct field, ensure the Repository > Push
trigger is checked and click Save.
Back in Cube Cloud, click Connect to test the webhook.
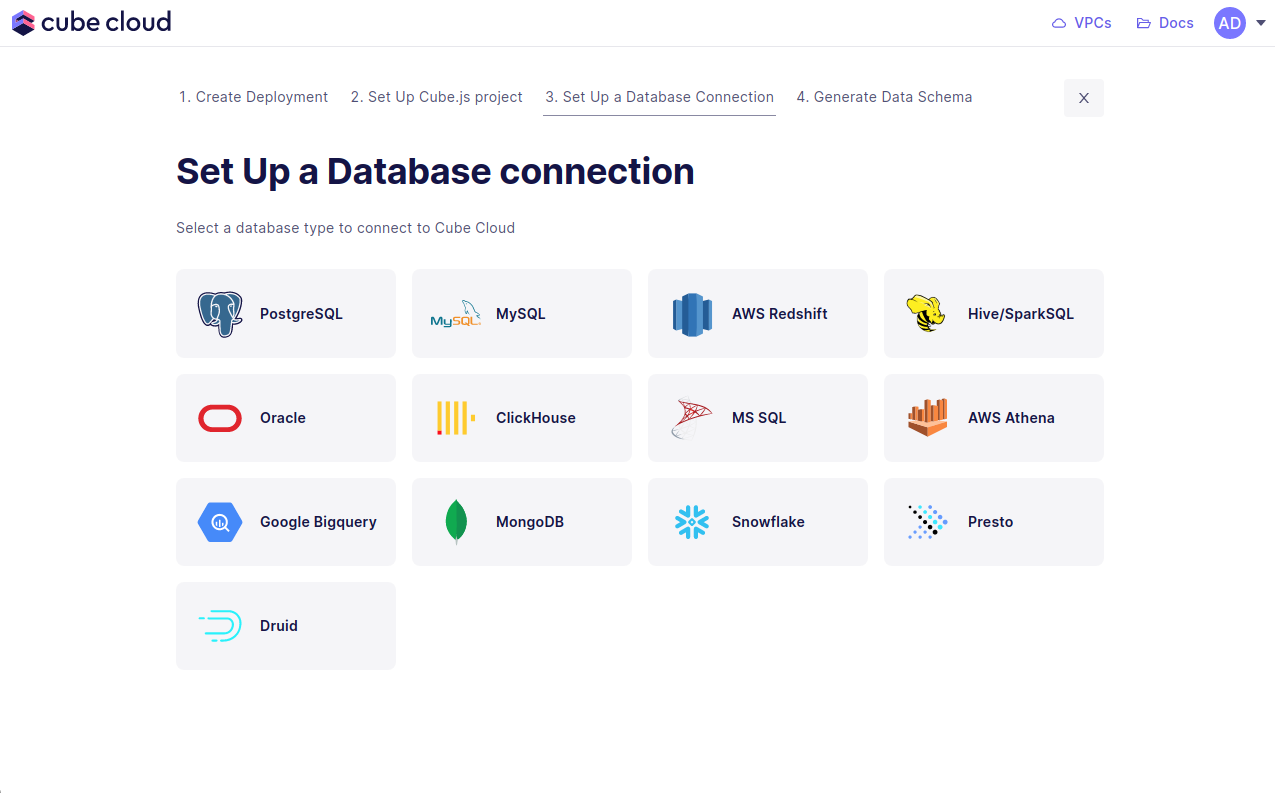
Step 4: Connect your Database
Enter your credentials to connect to your database. Check the connecting to databases guide for more details.
Want to use a sample database instead? We also have a sample database where you can try out Cube Cloud:
| Field | Value |
|---|---|
| Host | demo-db.cube.dev |
| Port | 5432 |
| Database | ecom |
| Username | cube |
| Password | 12345 |
In the UI it'll look exactly like the image below.
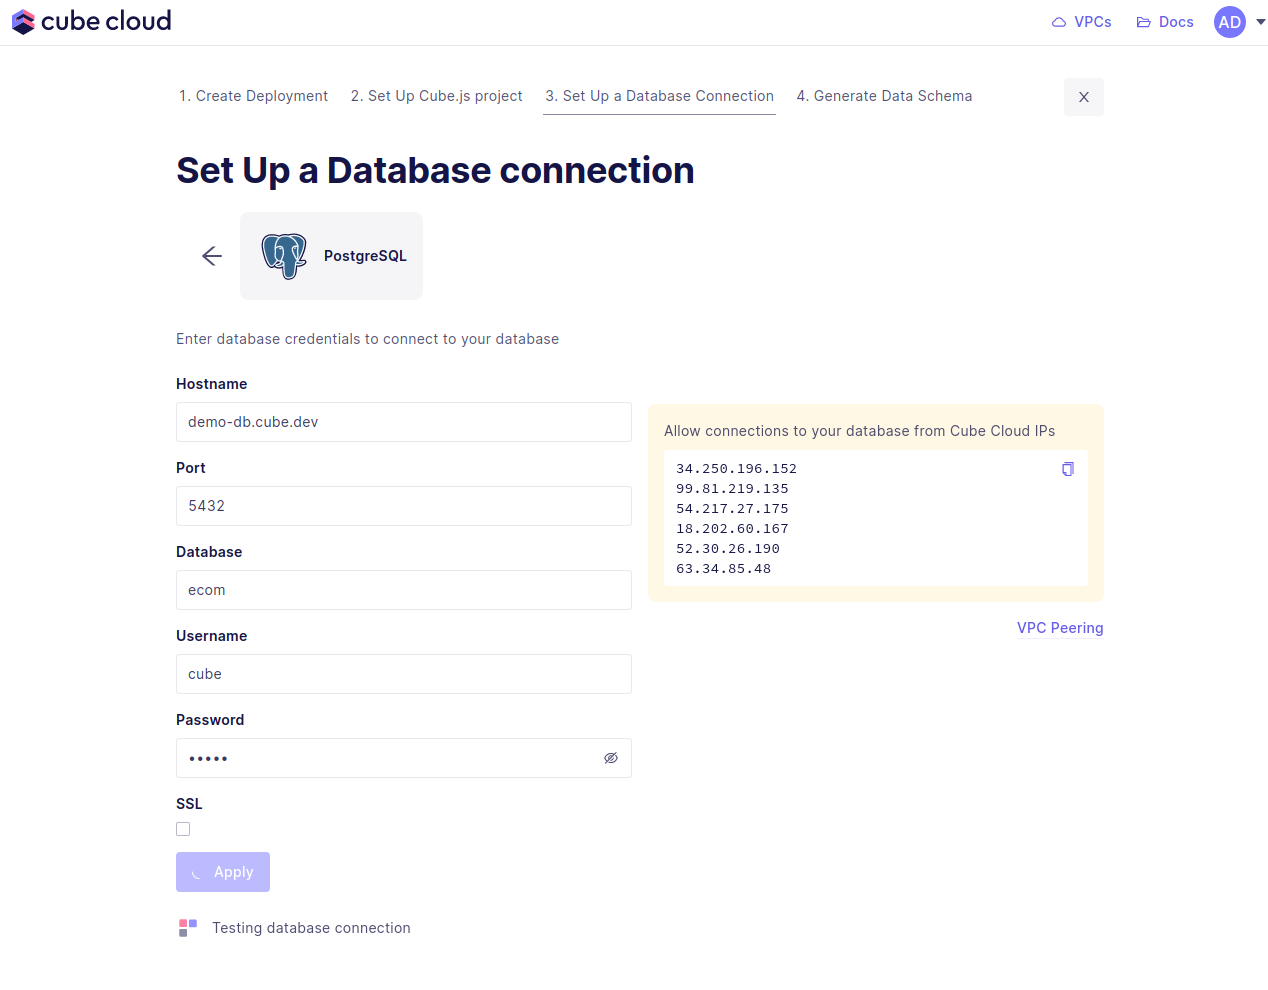
If you run into issues here, make sure to allow the Cube Cloud IPs to access your database. This means you need to enable these IPs in your firewall. If you are using AWS, this would mean adding a security group with allowed IPs.
Step 5: Generate the Data Model
Step five in this case consists of generating data models. Start by selecting the database tables to generate the data models from, then hit Generate.
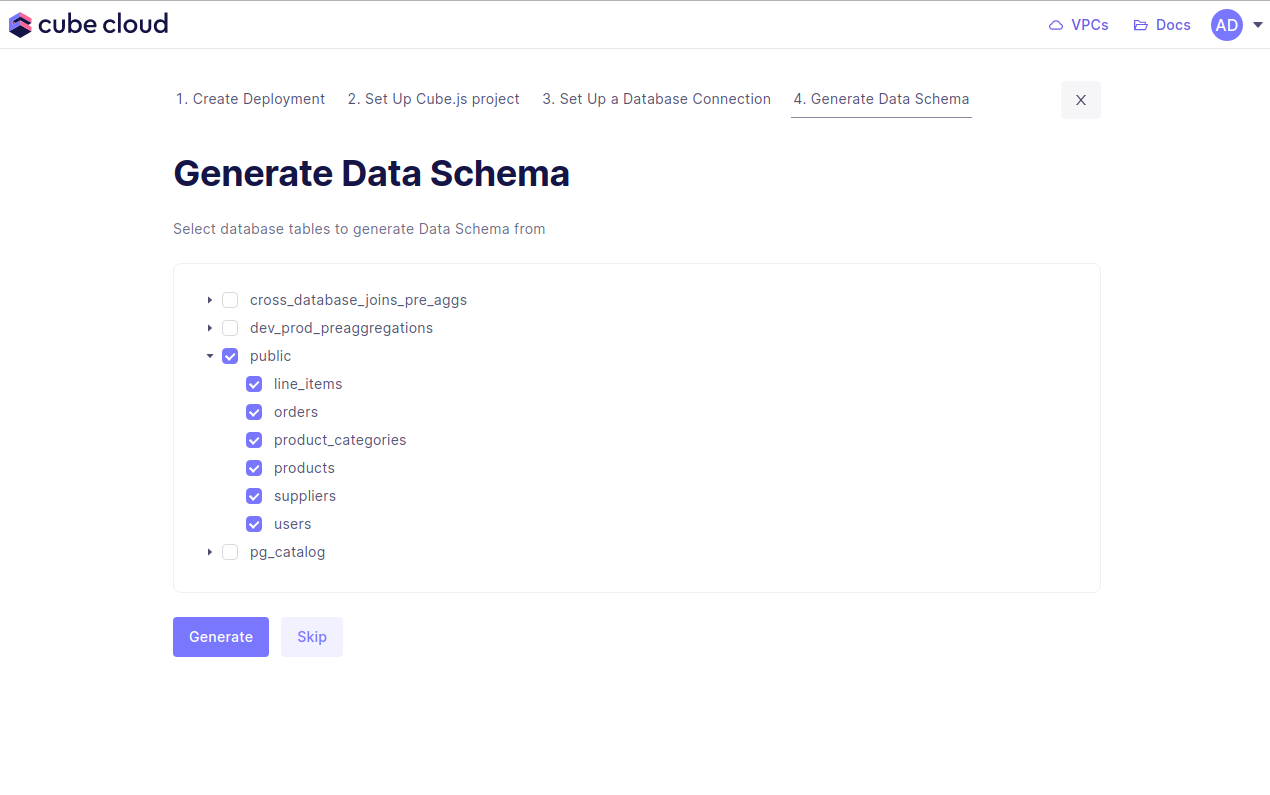
Cube Cloud will generate the data models and spin up your Cube deployment. With this, you're done. You've created a Cube deployment, configured a database connection, and generated data models!
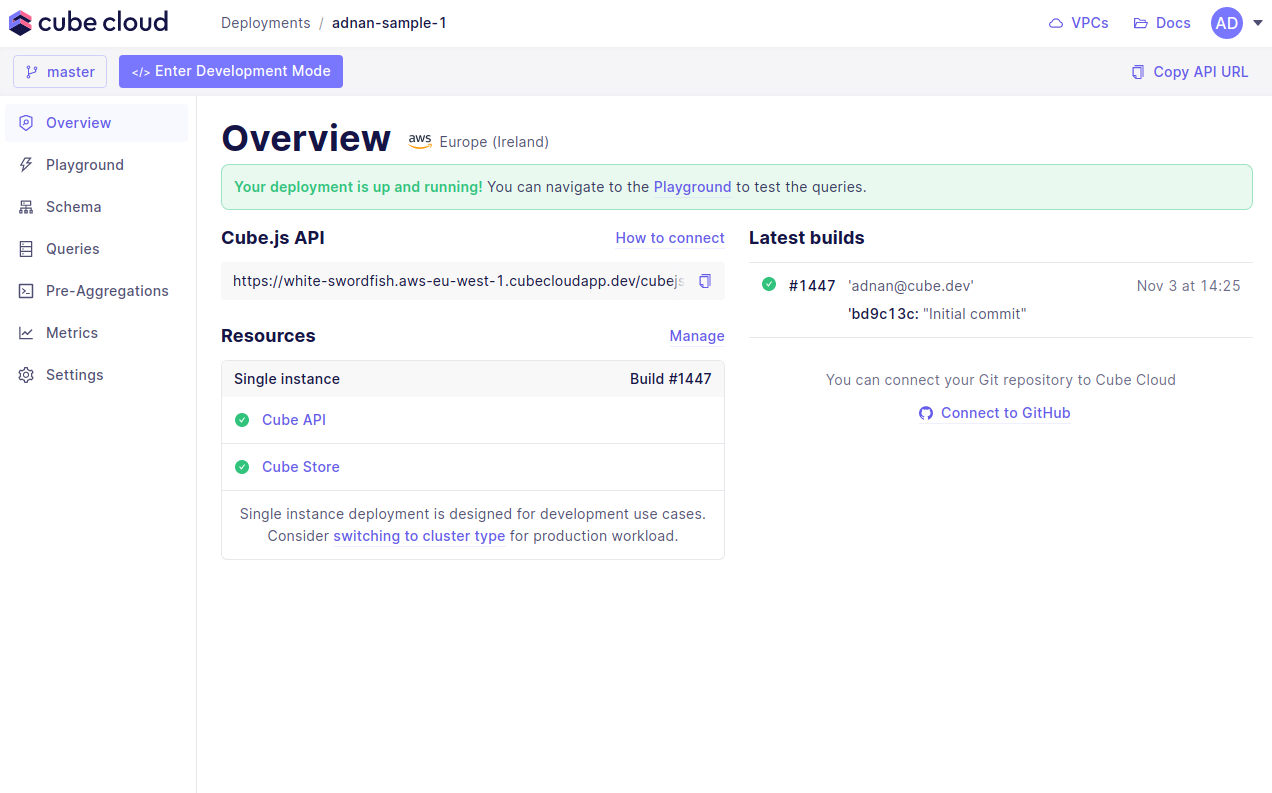
You're ready for the last step, running queries in the Playground.
Step 6: Try out Cube Cloud
Now you can navigate to Playground to try out your queries or connect your application to the Cube Cloud API.